
Site Departments & Sections
3 min read
Introduction #
Welcome to the Allday Time Systems Site Department & Section Management Guide.
This document will cover:
- Navigating to Dept/Sections
- Overview of Dept/Sections page
- Viewing and creating absences
- Adding and editing new Sections
Navigating to the Dept/Sections #
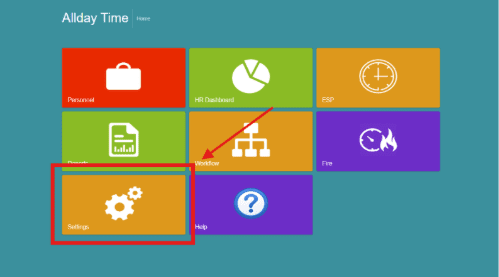
From the FreeTime dashboard, click the ‘Settings’ tab to access the personnel home.
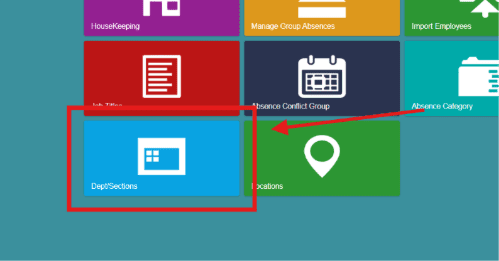
From the settings home, click ‘Dept/Sections.’
Overview of the Dept/Sections page #
At the top of the page are all the different tabs within the settings area, along with Dept/Sections.
- The job title tab allows you to create new job titles to be used when making new sites and creating employee profiles.
- The absence categories tab allows you to only create new and edit absence categories.
- The Site/Department/Section labels tab enables you to create and edit new sites, departments, and sections.
- The custom exceptions allow you to edit and create new exceptions.
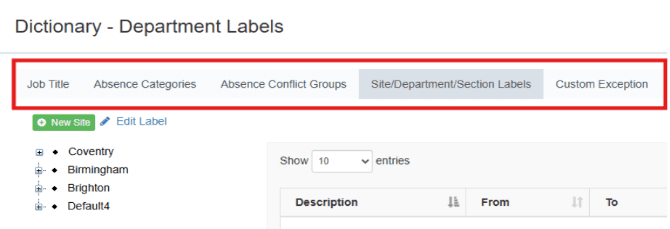
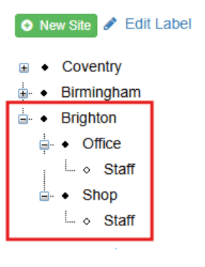
The dept/sections page displays all the sites, sections, and job titles available on your Freetime web portal.
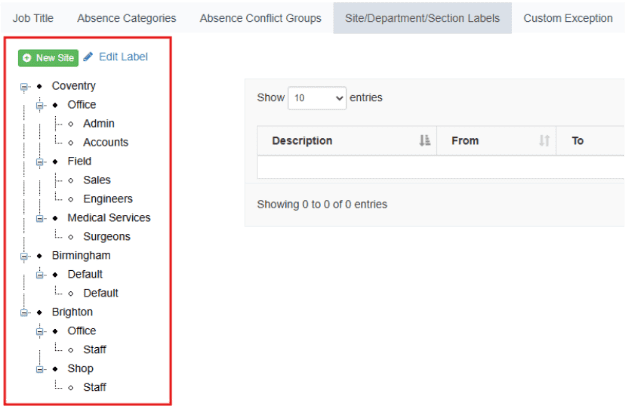
The sites/departments/sections are organized in staggered dropdowns.
See the example below, where Brighton is the site, offices and shops are the departments, and staff are the section labels.
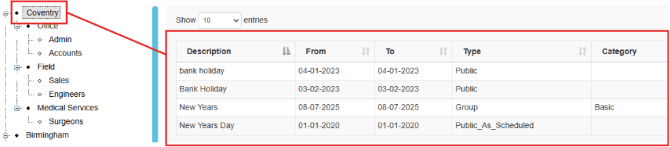
The table, at the center of the page, is used to display group absences for all sites, departments, and job titles. The table contains an absence…
- Description
- Date (From, To)
- Type (Absence type)
- Category
- Ded (Deduction)
- Hours
- Starting
- Action
Viewing and Creating Absences #
The table on this page allows an employer to view all created absences for every
- Site
- Section
- Job title
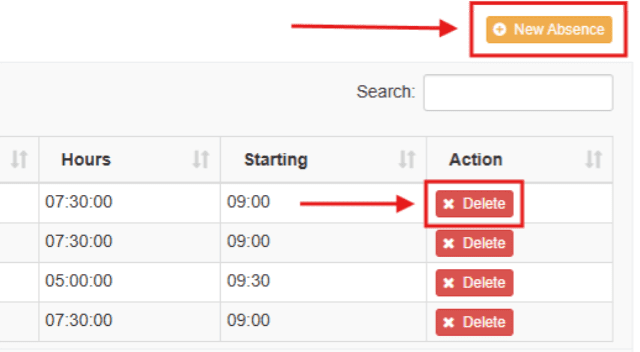
To view absences for a specific area, select your desired site, department, or section from the dropdown menus, and if any absences have been recorded, they will appear in the table on the right-hand side
An employer can also add absences from the absence button on the right-hand side of the page and has the option to also delete any absences if necessary.
Note*: If struggling, please refer to Guide 5: Viewing & Booking Absences, Group Absences.
Adding new Sections and editing Labels #
To create a new section, click on the ‘New Site’ button
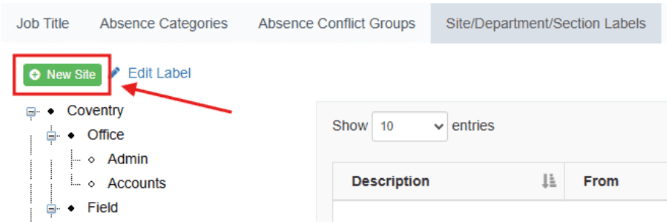
At the bottom of your area’s dropdown, a new site, section, and job title, all named ‘Default,’ will be created.
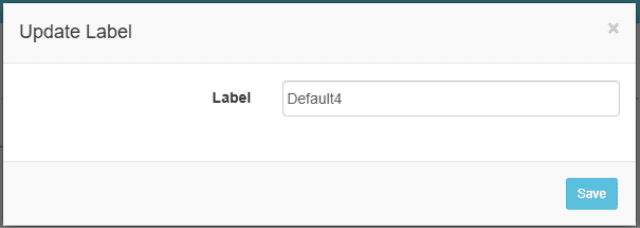
To change the name of your new site, select any of the areas in your new site and click on ’Edit Label.’
A pop-up will then prompt you to update the name of your area. Once you have updated the name of your new area, press ‘save.’
Upon pressing save, recheck your dropdown to see if your new area’s name has been updated correctly.


