
Employee Workflow & Absence Requests
1 min read
Introduction #
Welcome to the Allday Time Systems Employee Workflow Guide.
This document will cover:
- Navigating to Employee Workflow
- Overview of Employee Workflow
- Creating an Absence Request
Navigating to Employee Workflow #
From the Freetime dashboard, click the ‘Workflow’ tab to access the Workflow Home.
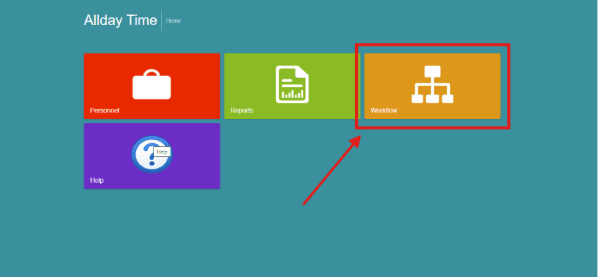
From the ’Workflow’ tab, click on ’Employee Workflow.’

Overview of Employee Workflow #
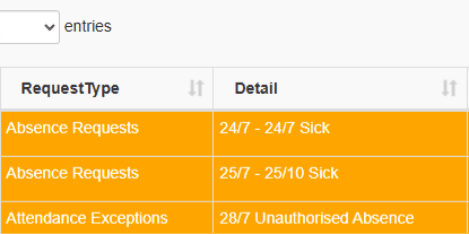
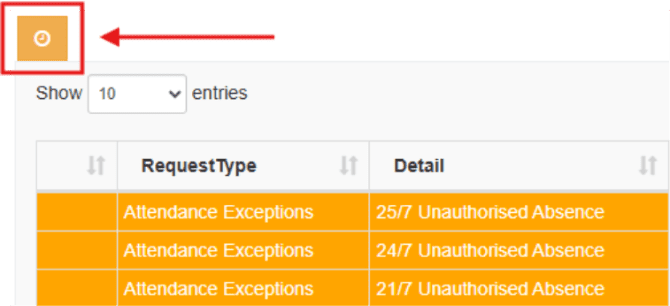
The employee workflow page displays all absence requests created by an employee and attendance exceptions flagged by events such as employees having unauthorized absences and early/late exits from their timesheet.
The table includes details of the absences such as the following:
- Request Type
- Detail
- Status
- Manager Notes
- Approved/Rejected By
- Approved/Rejected On
- Leave applied on
- Action

The absence request table only allows you to cancel absence requests and filter the individual columns by results in the search box.
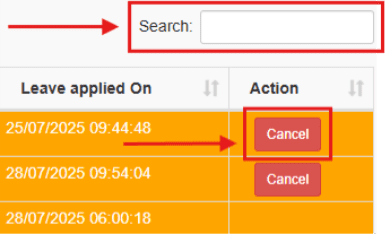
Result of a cancellation #

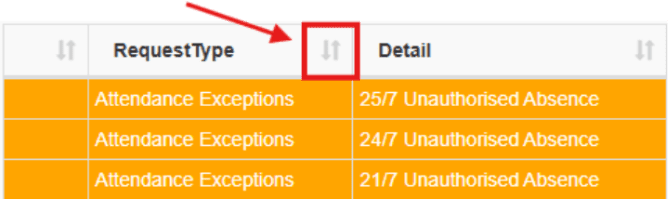
On each column header you have the option to filter the results in all columns in order of the following:
- Alphabetical order
- Lowest to highest value
- Earliest date to current date
by toggling the two opposite parallel arrows
Creating an Absence Request #
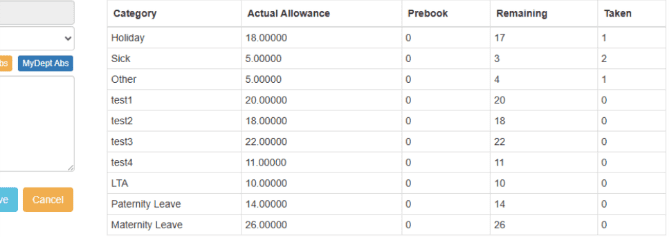
The absence request page allows you to book an absence request to be approved by the employer/manager. This page displays a table of your previous absence categories and absences, along with all absence requests made so far.
Note*: An absence request will be made according to the employee profile of the account. Absence requests cannot be made for multiple employees under one profile or for another employee.
To create an absence request, click on the yellow clock icon.
Once on the page, select the date and time, you would like to book your absence using the ’From, To’ date dropdowns
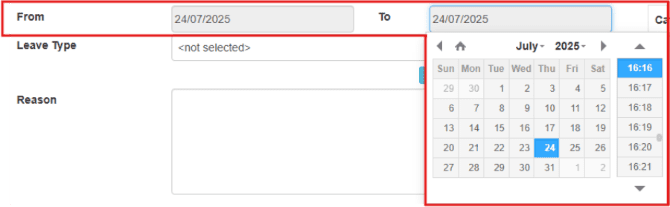
Next, select your leave type using the ‘Leave type’ dropdown

You can additionally view your absence categories and allowances for each category on the right-hand side of the page.
Once completed, add a comment for your absence request, if necessary, and click ‘Save’ to create your absence request.

Upon an absence request’s completion, an employer has the option to approve or reject your absence request. An absence request will appear red if your employer has rejected it, green if your employer has accepted it, and yellow if it is still pending.


