Adding and Editing Employees
8 min read
Introduction
Welcome to Allday Time Systems. Employee Record Overview guide
This document will cover:
- How to add a new employee record
- How to search for and navigate to an existing employee
- Employee profile overview
Adding a New Employee
#
How to add a new employee record
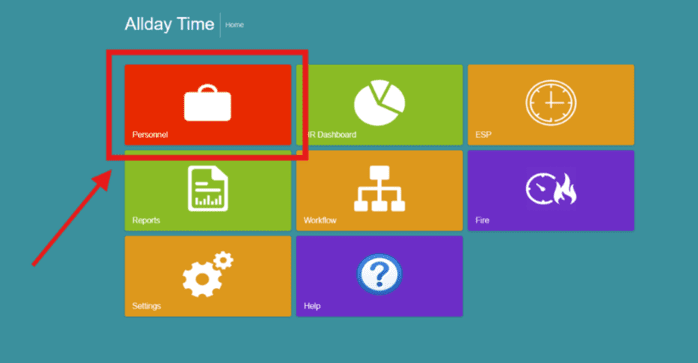
From the Freetime dashboard, click the ‘Personnel’ tab to access the Personnel Home.
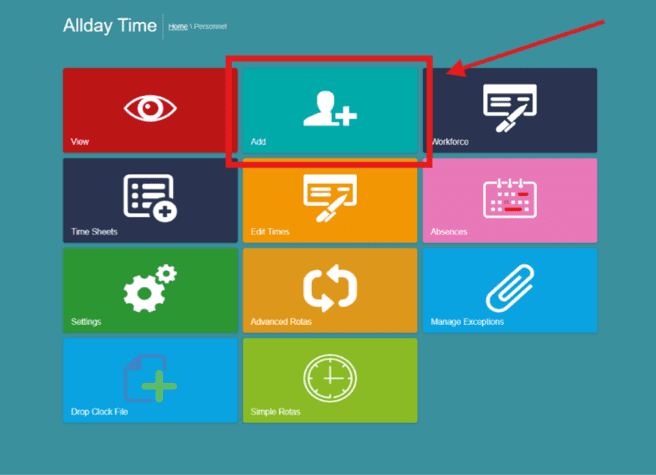
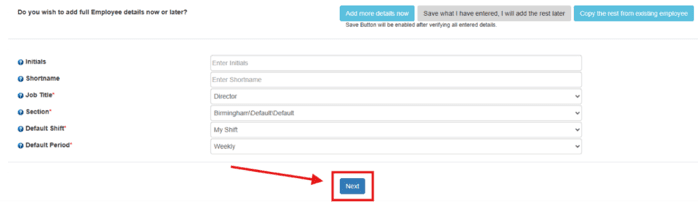
From the personnel’s home, click the ‘Add’ tab.
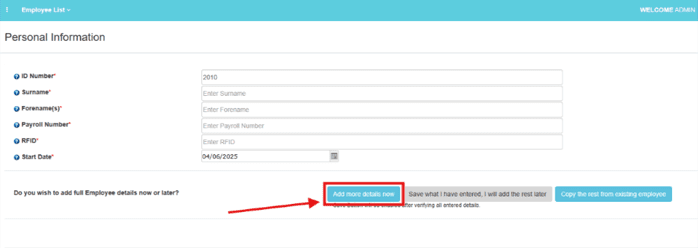
Enter the details of your new employee on each of the ‘Personal Information’ tabs and click on the ‘Add more details now’ button to proceed with creating your new employee.
*Important Guidelines
- The ID on the employee’s web portal needs have the same ID as their enrolment on the terminal
- Payroll number does not need to match the ID.
- Employee ID should not have any leading zero’s
- All tabs with red asterisk are required
Continue to add your new employee details, then proceed by clicking on the ‘Next’ button.
* Note: All tabs marked with a red asterisk are required. Tabs without a red asterisk are optional.
This page shown below handles
- Absences and absence categories.
- You can select the date you wish your employee’s absence year to start.
- Below are absence categories that can be enabled and disabled for your new employee.
To set the default bank holiday hours for employees, select “Allocate any bank holiday as” and specify the number of hours the employee would normally work on that day.
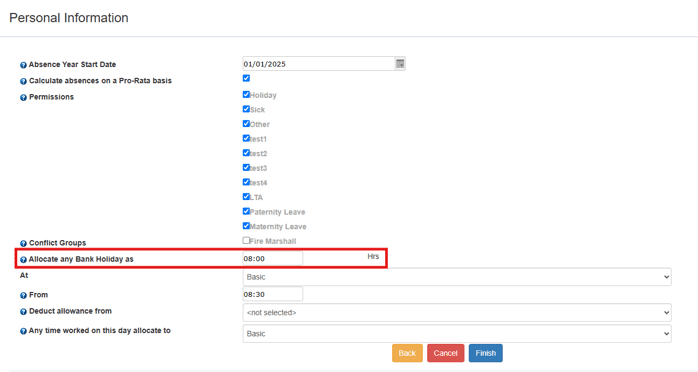
Once finished, click on the ‘Finish’ button to create your new employee.
Searching for Employees
#
How to search for and navigate to an existing employee
There are several options to find employee records in the system depending on where you start from.
Quick search
From the HR Home screen or from any deep content screen, you will see the quick search option at the top left side of the screen.

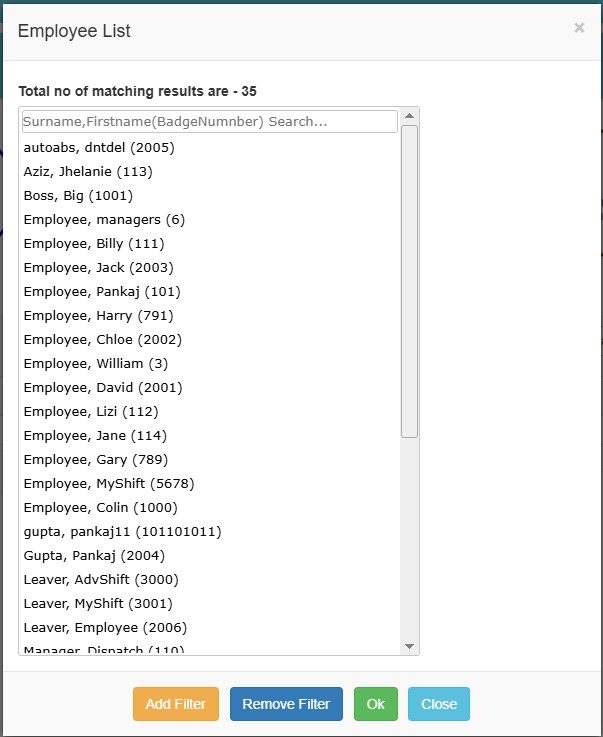
Use of this button will show a quick search popup list of employees in the system that that operator has access to. Further filters can be added to limit this list by use of the Add Filter button on that popup.
The list can be quickly filtered by typing an employee’s name or number into the top field.
To select an employee from the list to view, simply double-click on them or select them and select the ok button.
Search from the Tiles menu. #
Accessing the search feature from the tiles menu
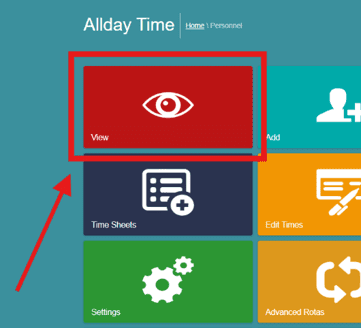
From the Freetime dashboard, click the ‘Personnel tab’ to access the Personnel Home.

Next, click on the ‘View’ tab to access the ‘Find employee’s’ section.
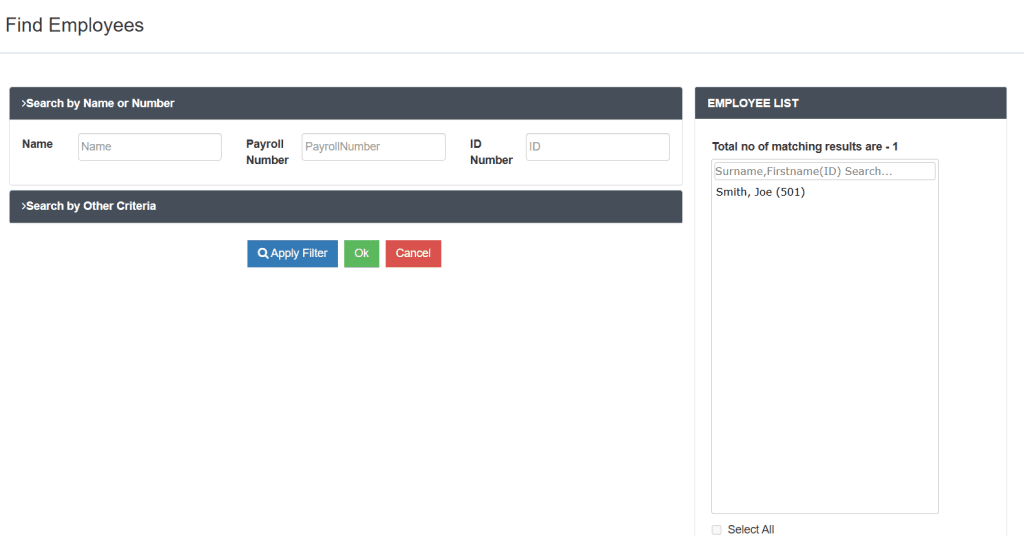
To search for employees, you can filter by any of these:
- Name
- Payroll number and
- ID number
on the ‘Search by Name or Number’ tab.
This will show the results in the ‘Employee List‘ tab.
Select the employee by double-clicking their name to view their profile.
or select the employee’s name and click on the ‘OK’ button.
*Note: Not all the fields have to be entered to find the employee.
*Note 2: Make sure employee names are entered correctly on the search bar, including spaces in names.
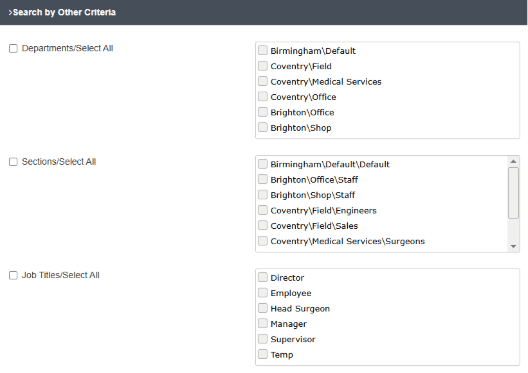
“To search for employees in groups, select the ‘Search by Other Criteria’ tab.
You can search for an individual employee or groups of employees by filtering…
- ‘Departments’ filtering by location and department
- ‘Sections’ filtering by location, department, and job field
- ‘Job Titles’ or ‘Shifts/All’ filtering by different shift types
Employee profile overview #
Introduction
In this section of the guide, we will be overviewing all tabs on an employee’s profile.
General
Once on the employee profile, you can view different tabs, starting with the General tab.
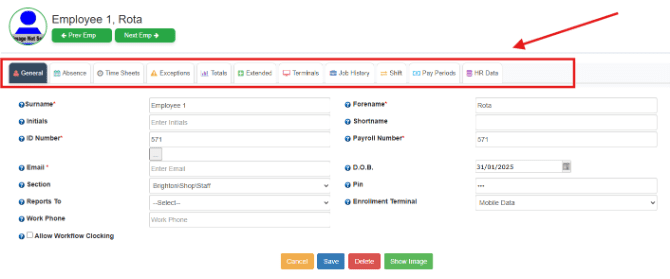
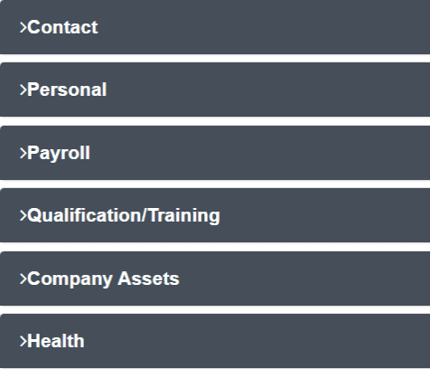
The general category gives you access to the employee’s information and details, which were entered when creating the employee.

Absence Tab #
In the absence section the ‘Absence’ tab allows you to manage employee absences.
The allowances section presents the different absence categories available and what is
- Remaining: This is what the employee still has available to book.
- Taken: This is what the employee has already taken.
- Pre-booked: These are what the employee has booked but not taken.

The group absences section allows you to view group absences. This would be used when booking national holidays for all employees, such as public and bank holidays.

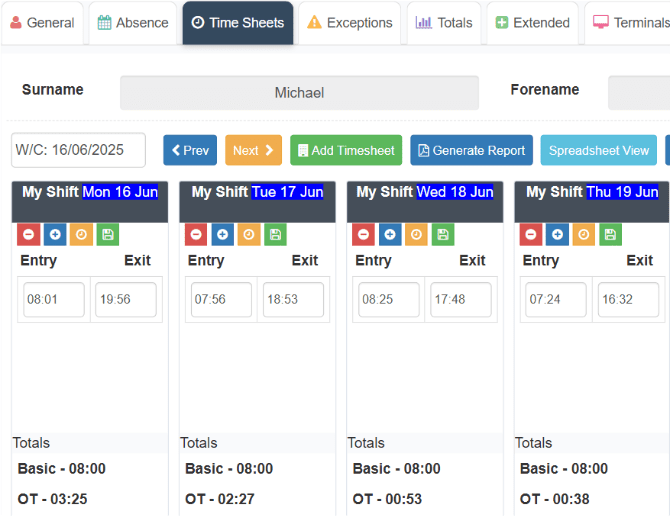
Timesheets Tab #
The Timesheets tab displays your employee’s weekly attendance times in the form of timesheets, including any absences booked.
You have the option to manually create, edit and update your
Employees clock in by selecting the green ‘Add Timesheet’ to add a timesheet and the small blue ‘+’ icon to add clocks.
Spreadsheet view #
By selecting the spreadsheet view button, your timesheets will be presented as a spreadsheet-style screen.
On this screen any missing attendance times in need of attention are quickly raised to the operator by the cell being red. allowing quick finding of any such issues.
*Note: Altering shifts is in another user guide. If you’re looking for information and assistance on shifts, contact the support team: support@alldaytime.co.uk.
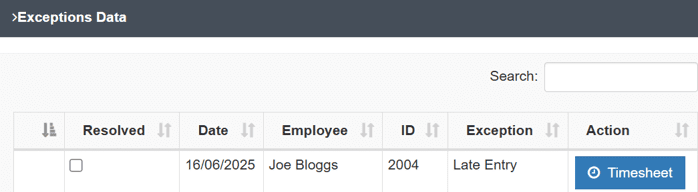
Exceptions #
The Exceptions tab displays the employee’s exceptions. Exceptions are flags created by events such as an employee being absent or missing a clock-out. Exceptions are customizable based on your shift settings.
E.g., in the example below, the shift starts at 8am. The late entry exception is set between 8am and 9am. The employee has clocked in between 8am and 9am, which triggers the exception.
Totals #
The total tab shows the total hours worked by an employee for a period.
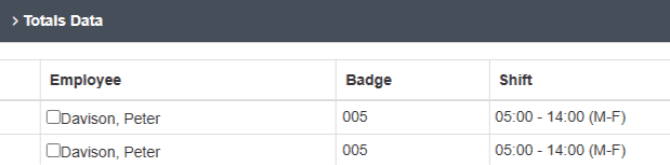
E.g., if your employee is on a weekly shift, by default their period is from Monday to Sunday.
Note*: A period refers to an entire week, Monday to Sunday.
Extended Tab #
The extended tab presents additional information about your employee you can fill out.
If there are fields you need that are not in the system, you can create new fields in the system dictionary, which will appear in the extended tab. These fields can be set to allow free text entry, numerical entry, specific preset choices, or yes/no answers as required.
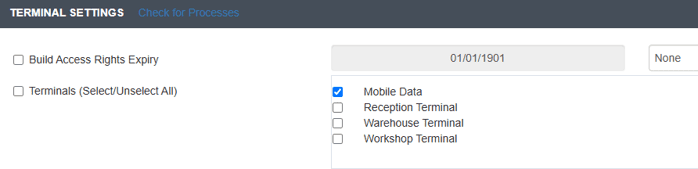
Terminals #
The terminals tab displays
- Terminal settings
- Settings for the Mobile App, if you have the Workflow Plus option
The use of this section depends on the attendance or access control hardware configured in your system. If you are unsure which hardware you are using, please contact the support team for confirmation.
This section is primarily used for PT1400 or Sentinel hardware, as well as for setting up mobile app users. There is no functionality on the initial screen for face reader devices.
Excluding all faceprint devices, if your terminal is compatible with RFID cards and fobs, entering the number here will update the terminal automatically.
On the terminal settings, you can select which terminals your employee can use, as shown below.
Note*: You can select more than one option; in the example below, this employee can clock in using the mobile app.
Employee Face Synchronization #
Face reader devices can be synchronized, moving or updating employee face registrations from one device to another using the “Terminal Manager” button at the bottom of the page. From there, you can also remove employees from a device and set the device time.
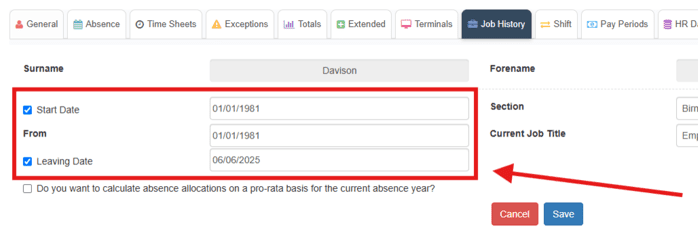
Job History #
The job history tab shows the employee’s starting date in the workplace. You can also add their leaving date in the event they ever leave the workplace.
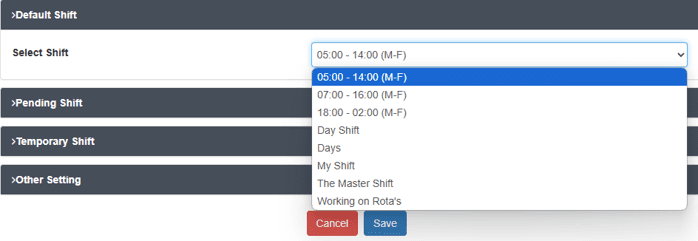
Shift Tab #
The Shift tab defines the employee’s shift pattern.
If an employee is assigned to MyShift, administrators can configure shifts directly within the system for individual employees or groups.
Other shift types are typically configured and maintained by the support team.
Employees using MyShift also have access to additional reports within the Reports section, providing greater flexibility for exporting and analyzing shift data.
The shift tab shows the different shift patterns available to set an employee on.
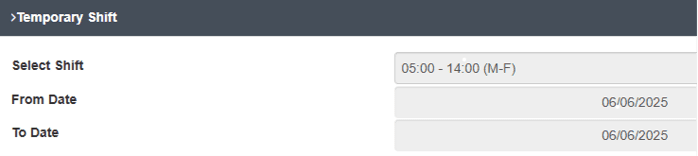
A pending shift allows a new shift pattern to be automatically applied to an employee at a later date.

A temporary shift allows a shift pattern to be applied to an employee for a temporary period.
Pay Periods #
The pay periods tab allows you to
- Set different lengths of pay periods for your employees
- Set temporary payment periods
*Note: If you need to add or edit Pay Periods, it is advised you contact the support team at support@alldaytime.co.uk.

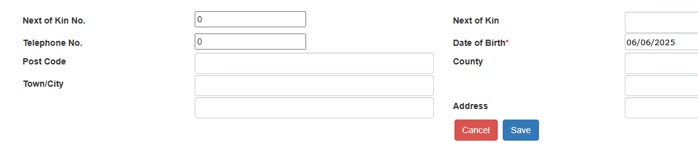
HR Data #
The HR tab provides personal and business-related information concerning the employee. It is not necessary to fill this section in.