
Myshift – Setup your employees shifts.
9 min read
What is MyShift? #
MyShift allows you to set up your own shift patterns for employees, either individually or by creating templates that can be applied to multiple employees at once. Without the need to contact Allday support team.
Where do I start? #
You need to understand to start with if you are going to set up different shift rules for every one of your staff or create some templates that cover all the shared shifts they use then apply these to the groups of staff who will use them.
To start using My Shift, you can either set up each employee individually or set up templates that you can apply to multiple employees .
Set up MyShift for an Individual Employee: #
- Go to the employee’s Personnel File.
- Click the Shift tab.
- In the Select Shift drop-down, choose MyShift.
- A custom template will be created, which you can then edit as needed.
A new custom Myshift setup will then, as default, allow employees to clock in and out and will add up the attendance hrs from start time to finish time.
For this type of very flexible open shift you do not need to add any zones but you may choose to set some of the other options lower in the setup screen as required.
If you require guidance on restricting this shift or adding breaks or any other setting jump to Guidance on Myshift setup below
Creating a MyShift template you can apply to many staff: #
- From the Dashboard go to Settings, then MyShift Settings:
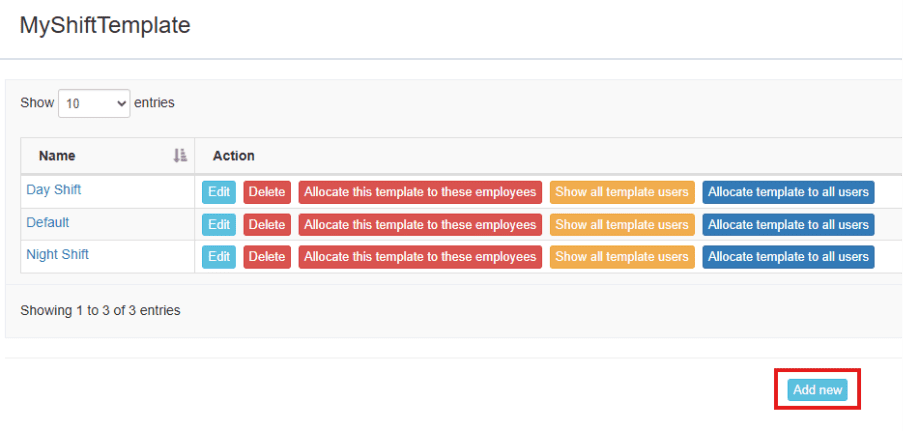
- To add a new template, click “Add new” in the MyShift Template screen.
A pop-up will appear to allow you to name the new template, as well as give you the option to copy settings from an existing template.
A new custom Myshift setup will, as default, allow employees to clock in and out and will add up the attendance hrs from start time to finish time.
For this type of very flexible open shift you do not need to add any zones but you may choose to set some of the other options lower in the setup screen as required
After creating your new Myshift templates you can allocate them to your employees on mass from this screen.
If all employees will use the same Myshift template use the “”Allocate template to all users” option.
If you have various groups of employees for each template you can select “Allocate this template to these employees”
While allocating employees you will be given an option to allocate to the employees and reprocess the attendance from a past date. This is usefull if you have a shift change that has to be back dated and allows you to reprocess the attendance using the new rules from the date specified.
Guidance on Myshift set up #
Zones #
Zones are the primary method of dividing up a shift day to tell the system how it should process attendance records. No 2 zones on any shift should overlap as this will cause a conflict.
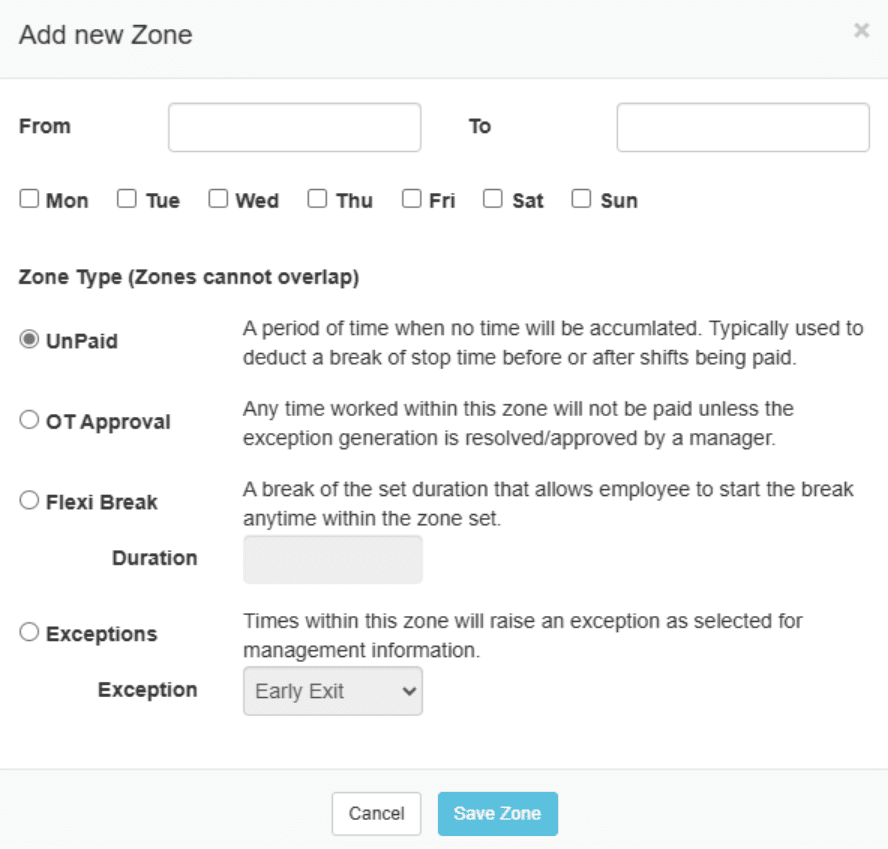
Click Add new Zone, and the pop-up gives the following options:
- Start and end times of the zone
- Days the zone applies to
- Type of zone (e.g. unpaid, exceptions etc.)
When you’re done, click save zone.
Zone detailed descriptions
Unpaid zones
Are a period of time when no time will be accumulated, but the employee can still clock in or out. In addition to placing these before and after a shift to stop an employee from accumulating overtime, they can also be used to create mandatory, set time breaks where the employee will not need to clock out and back in for the time to be deducted.
- OT Approval zones are a period of time in which additional time must be approved.
- IN times that fall within the zone will be rounded forward to the end of the zone and time calculation will start from there, unless approved.
- OUT times that fall within the zone will be rounded back to the start of the zone and time calculation will end there, unless approved.
Approval of the original clock time can be done by the system user accepting the relevant exception raised by the system in the “Manage Exceptions” page, therefore approving the time or Overtime.
Flexi Breaks
These are periods of time during which, if an employee clocks out, the time will be recorded as a break. If the employee does not clock out during this period, no break will be deducted. In the example below, if an employee clocks out for 45 minutes between 11:00 and 14:00 the system will deduct an hour from their worked time on that day. If they clock out for more than 1hr then the extra time will be deducted if they do not clock out no break will be taken.
Exception zones
Are a period of time which if an employee clocks, this will raise an exception to be viewed by a system user or manager (if Workflow is in use). This is most commonly used for automatically flagging Late Entries or Early Exits, but new exception types can be created within the System Dictionary.
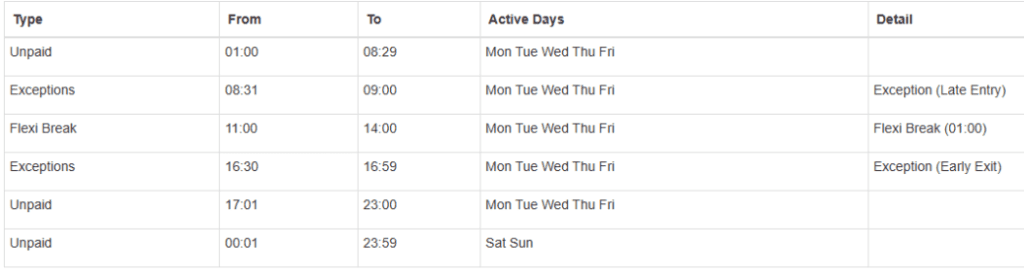
A practical example
Using zones, we can quickly create a wide variety of shift patterns.
Example: a 08:30 – 17:00 shift that runs Monday to Friday, and allows employes to take a 1 hour unpaid break any time between 11:00 and 14:00.
Employees clocked in up to 30 minutes late or clocking out 30 minutes before the shift ends will be marked with an automatic exception.
Employees can clock in before their shift, or on the weekends, but will not be given time.
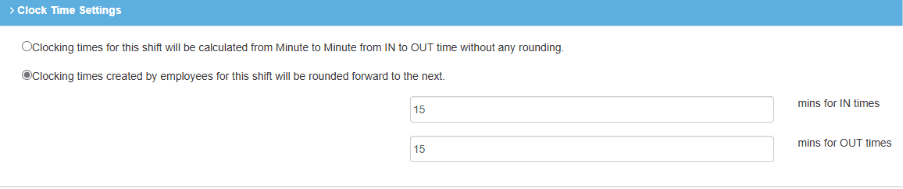
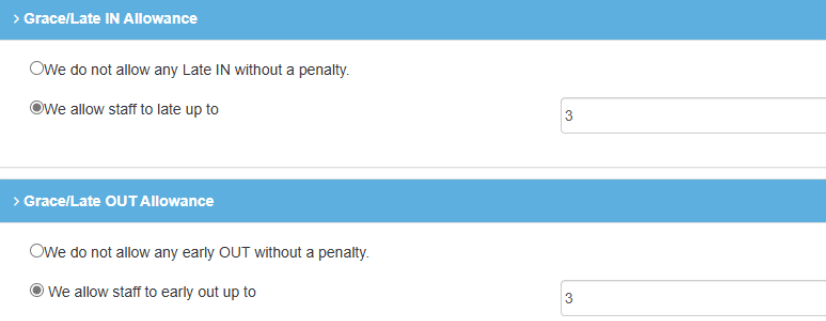
Rounding and Grace #
To set up Rounding and Grace periods:
- Click “Clocking times created by employees…”
- Enter the rounding minutes and grace periods
Example: A 15-minute rounding rule and a 3-minute grace period for clocking in/out.
Any clock time that falls within a grace minute allowance will be rounded in the employees favour. So they can arrive late up to the set allowance and be paid from the start of the rounding for example with 3 mins In grace and 15 min rounding a clock time of 09:02 would round to 09:00.
Night Shifts #
When allowing employees to work past midnight, you must enter the longest amount of time they are entitled to work.
This setting automatically breaks the shift at the set time to avoid issues when employees forget to clock.
Example: A night shift setting with 14 hours as the max time. So for a night shift where employee clocks in at 18:00 the shift will cut off at 08:00 the next day so any clock time after this will be taken as an IN for the start of a new shift.

Auto Break #
Auto breaks automatically add break time based on the number of continuous hours an employee works. For example, if an employee works for 6 hours, they are entitled to a 30-minute break. Rather than requiring the employee to clock out, the system will automatically apply the break.
We recommend setting auto breaks approximately halfway through the shift.
Example: With the settings below, after 6 hours worked the system will automatically deduct 60 minutes from an employee’s total hours for the day.

Note auto breaks will apply in addition to flexi breaks. When setting up breaks, it’s best to choose one method:
Flexi breaks, (where employees get a break of set duration within a time band if they clock out but not if they don’t)
Unpaid time zone,(where anyone clocked in within that time zone will not have that time accumulated)
Auto break.(where the break is deducted without employee clocking out after a set amount of time at work)
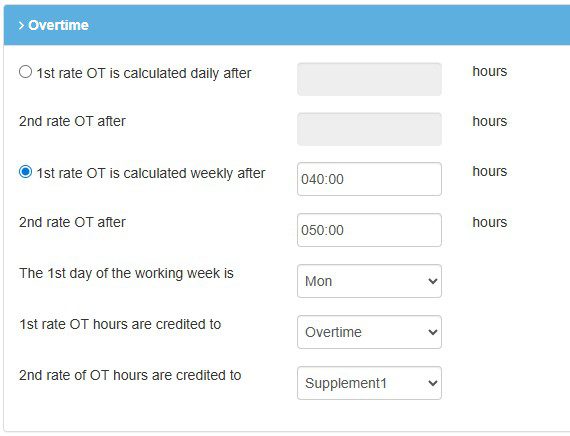
Overtime #
In MyShift, overtime refers to the time an employee works beyond their regular shift that qualifies for additional pay. Note without any overtime setup, the system will apply the basic pay rate for all hours worked.
To set up overtime:
- In the template, you can choose whether overtime will be applied daily or weekly.
- Define the number of hours an employee must work before overtime kicks in.
Example: In this example the employee will get the 1st 40hours per week at Basic then overtime will automatically apply up to 50 hrs then any further hours above 50 will be placed in Supplement1 catergory. Note the Names of your Overtime catergories can be altered to your needs simply ask the support team for help to do this.
Note that if the system detects overtime conditions, it will calculate the additional hours accordingly, based on the daily or weekly threshold you’ve set.
Special Hours #
Special Hours are used to apply custom settings that override the standard shift zones. These are useful for specific situations, such as applying overtime or different rates during exceptional times.
Example: These Special Hours apply between 08:30 and 17:00 on a Saturday. This will apply even if the employee hasn’t reached their normal overtime threshold.

The special hours category to be credited is recommended to be one that is not in use for standard overtime, as this will avoid calculation conflicts.
Special hours are applied on top of your normal overtime rules, and can override them when needed.
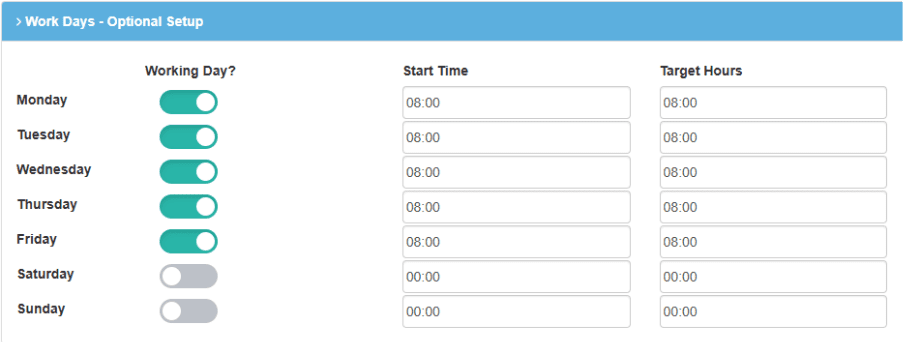
Work Days #
Work days can be set to advise the system which days an employee is expected to be clocked in. Start times should be set so the system will not declare an employee as unauthorised absent on the exceptions report prior to their start time. If the day is not selected as a working day then they will not appear as unauthorised absence on that day.
The “Target Hours” will be used to credit any employee that amount of hours when an absence is booked for them.
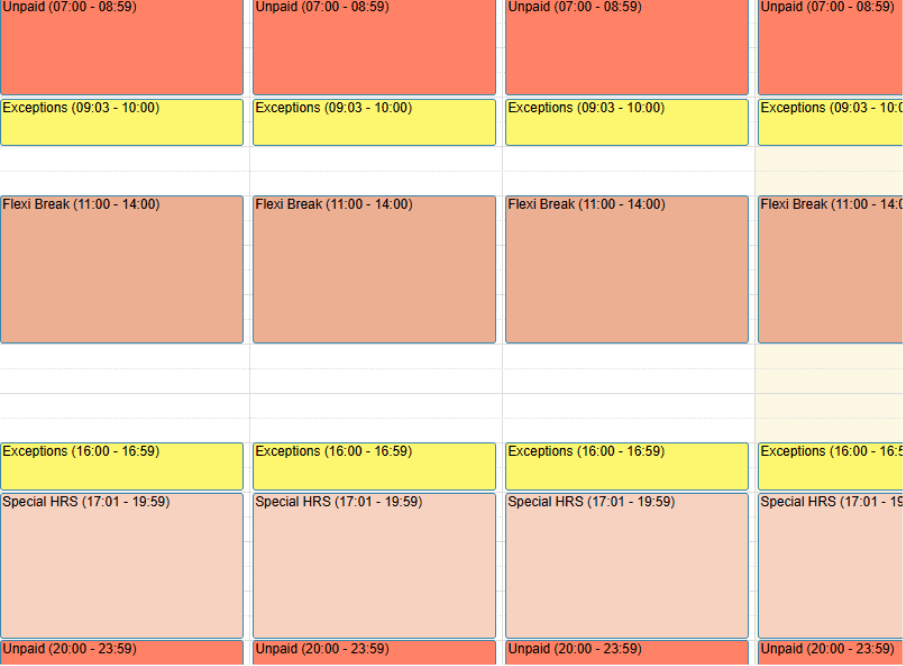
Shift Map #
If at any time you would like to review a template’s current set up in a more visual medium, you can use the shift map:
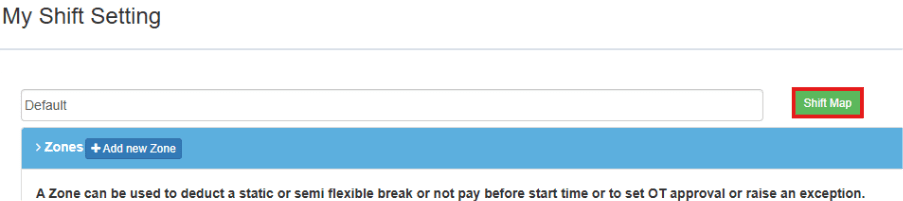
Which will bring up the zones you’ve set in a calendar format:
How do I apply a global template I have created to an employee? #
Once you have set up your templates;
- Go to the employee’s Personnel File.
- Click the Shift tab.
In the Select Shift drop-down, choose MyShift.
- Save the employee
- You should then see the Show Templates and Shift Map buttons as below
- You can now use the Show Templates button to select a new setup template and optionally reprocess any clocking times against this new setting from a date of your choice.

How do I apply a global template I have created to a group of employees? #
Alternately, you can apply templates to multiple employees at once via the MyShiftTemplate screen, as seen below:
There are two ways to apply templates to multiple employees from this screen. If you want to update all employees with the same template, you can use Allocate template to all users. This option will not be available in a mixed shift type system to prevent possible corruption . * extreme care should be taken using this option if it is available.
If it only needs to be applied to some employees, you can use Allocate this template to these employees. This will take you to a select screen. Where you can also optionally choose to reprocess the employee data using this new shift template from the date specified.
There is also an option to Show all template users which will give you a list of users with the template assigned to them- note that if you make any adjustments to an individual employee’s shift after applying to them, it will remove them from this list as they are then using a template all of their own as you have set it.


